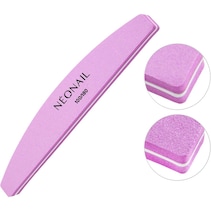
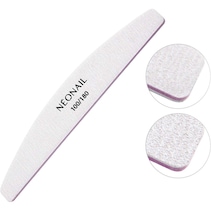
NEONAIL Artificial nails & nail design Stamping plate

Item available for immediate delivery, in stock
Item no.
oder direkt mit


-
Purchase On Account
-
Delivery in 2-3 days


Our recommendations for you

Filter
*contains reviews from the international parfumdreams shops. Reviews are not checked for authenticity
Product information
Description
Stamping plate
Range
Artificial nails & nail design
Product sub-line
Nails
Product type
stencil
Area of application
nails
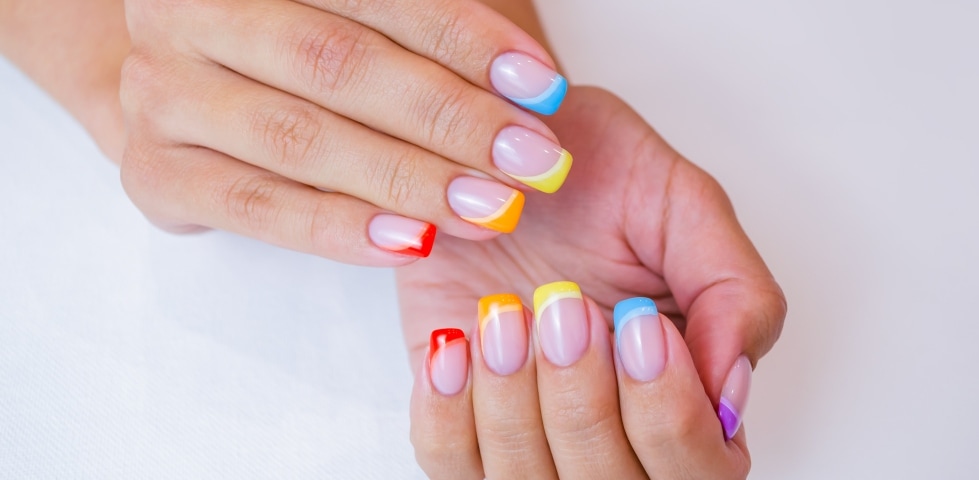
The NEONAIL artificial nails & nail design stamping plate provides exciting highlights for your nail make-up. The palette with its different make-up stamps is also suitable for anyone who loves exciting artificial nails & nail design but is not necessarily blessed with the talent of a Pablo Picasso. There's no need to do it yourself, because with the NEONAIL stamping plate you simply choose a suitable motif and then apply it to your nails in no time at all. To do this, first paint your nails with your favourite base and let the make-up harden under a UV/LED lamp.
How to create exciting artificial nails & nail designs using the stamping method
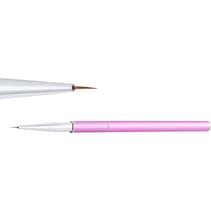
After curing, coat about half of the stamping motifs with stamping gel, then use a stamping scraper to apply the motifs on the NEONAIL stamping plate to the nail. Make sure that the previously selected base and the motif match in colour, but are not the same colour. The stamp is then smoothed out with a rolling motion and should then be fixed a little - simply apply a little pressure to the nail. The customised nail design should then be cured again under the UV/LED lamp. Finally, remove the peel-off rubber with tweezers.Use
Step by Step - Stamping plates
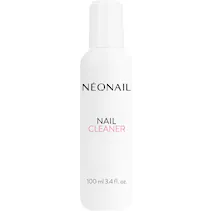
Clean the stamping plate with a cellular tissue soaked in cleaner.
Apply a small amount of stamping gel to the selected motif on the stamping plate. Now take the stamping scraper and pull the stamping gel over the design, removing any excess colour at the same time.
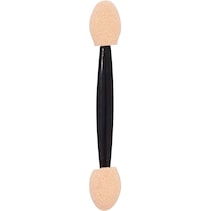
Take the nail stamp and place it on the outer edge of the motif and roll the stamp over the motif in a flowing motion.
Now roll the motif on the nail stamp over your nails (where you have already applied a base and the UV nail polish, cured each under the UV/LED lamp and removed the sweat layer of the colour layer) and allow the motif to cure under the UV/LED lamp according to the table.
Seal the design with a hard top and also cure it under the UV/LED lamp according to the table. Wipe off the condensation layer with a cellular tissue soaked in cleaner.
Clean the stamping plate and the scraper with nail cleaner.
Important: The stamping plates are protected with a protective film. Remove the foil before use.
Clean the stamping plate with a cellular tissue soaked in cleaner.
Apply a small amount of stamping gel to the selected motif on the stamping plate. Now take the stamping scraper and pull the stamping gel over the design, removing any excess colour at the same time.
Take the nail stamp and place it on the outer edge of the motif and roll the stamp over the motif in a flowing motion.
Now roll the motif on the nail stamp over your nails (where you have already applied a base and the UV nail polish, cured each under the UV/LED lamp and removed the sweat layer of the colour layer) and allow the motif to cure under the UV/LED lamp according to the table.
Seal the design with a hard top and also cure it under the UV/LED lamp according to the table. Wipe off the condensation layer with a cellular tissue soaked in cleaner.
Clean the stamping plate and the scraper with nail cleaner.
Important: The stamping plates are protected with a protective film. Remove the foil before use.
Warnings
For professional use only. Read instructions for use carefully. Avoid skin contact. Avoid contact with eyes. May cause allergic reactions. Discontinue use if irritation occurs. Keep out of the reach of children.
Protect from sunlight.
Manufacturer
You might also be interested in