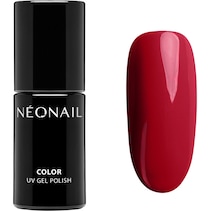
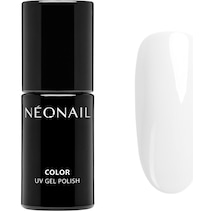
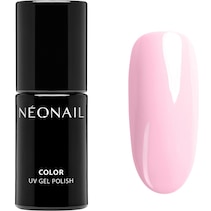
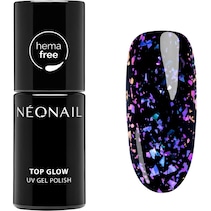
NEONAIL Cat Eye Satin Cat Eye Nail Polish

17
People have recently purchased this item


Item available for immediate delivery, in stock
Item no.


Guaranteed Original

Purchase On Account

Delivery in 2-3 days


Our recommendations for you


Filter
*contains reviews from the international parfumdreams shops. Reviews are not checked for authenticity
Product information
Description
Cat Eye Nail Polish,
Range
Cat Eye Satin
Product sub-line
Collections
Characteristics
long-lasting
Consistency
gel polish
Product type
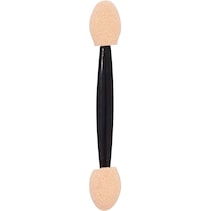
bottle, pen with sponge applicator
Area of application
nails
Finish
metallic, satin
NEONAIL Cat Eye nail polish: a fascinating effect for perfect make-up
The NEONAIL Cat Eye Cat Eye Nail Polish creates a unique magnetic effect on the nails that makes any make-up stand out. With its special formula and characteristic cat's eye look, it creates an impressive, three-dimensional interplay of light and shadow. This trendy manicure gives nails a mystical and glamorous look.
Magnetic look for special moments
The Cat Eye nail polish from NEONAIL features an innovative technique that uses a magnet to create the characteristic cat's eye effect. The fine metal particles in the lacquer react to the magnet and create a fascinating design that shimmers like a real cat's eye. This takes any make-up to a new level and ensures admiring glances. The application of NEONAIL Cat Eye Cat Eye Nail Polish is extremely simple: apply the cat eye polish as usual, hold the magnet over the wet nail polish and the striking pattern is created. The long-lasting and resistant polish also guarantees that the effect retains its full radiance for days.Perfect combination of colour and effect
Whether as a highlight for special occasions or as a complement to elegant make-up - the polish is available in various colours that can be perfectly matched to individual styles. The metallic nuances give the manicure an extraordinary depth and make it an indispensable accessory.Use
Step by step instructions
Application for a metallic effect:
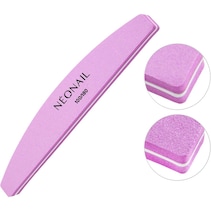
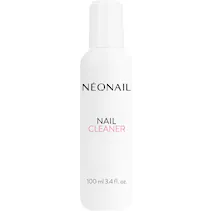
Step 1: Gently matt the nails with a buffer, remove dust and wipe off with a cellular tissue soaked in cleaner.
Step 2: Apply a thin layer of Hard Base and cure under the LED lamp according to the table.
Step 3: Turn the UV nail polish bottle in your hands before use (do not shake!) so that the small metal particles are evenly distributed.
Step 4: Then apply a very thin layer of the selected colour to the nail and cure under the LED lamp according to the table. This process can be repeated once to intensify the colour.
Step 5: Finally, apply a layer of Hard Top and cure under the LED lamp according to the table to smooth and seal the nail.
Step 6: Cure under the LED lamp according to the table and wipe off with a cellular tissue soaked in cleaner.
Application for a cat-eye satin effect:
Step 1: Gently matt the nails with a buffer, remove dust and wipe off with a cell tissue soaked in Cleaner.
Step 2: Apply a thin layer of Hard Base and cure under the LED lamp according to the table.
Step 3: Turn the UV nail polish bottle in your hands before use (do not shake!) so that the small metal particles are evenly distributed.
Step 4: Then apply a very thin layer of the selected colour to the nail, run a magnet vertically along the free edge of the nail at a distance of 5 mm and then cure under the LED lamp according to the table. This process can be repeated once to intensify the colour.
Step 5: Finally, apply a coat of Hard Top and cure under the LED lamp according to the table to smooth and seal the nail.
Step 6: Cure under the LED lamp according to the table and wipe off with a cellular tissue soaked in cleaner.
Application for a pearlescent effect:
Step 1: Gently matt the nails with a buffer, remove dust and wipe off with a cell tissue soaked in Cleaner.
Step 2: Apply a thin layer of Hard Base and cure under the LED lamp according to the table.
Step 3: Turn the UV nail polish bottle in your hands before use (do not shake!) so that the small metal particles are evenly distributed.
Step 4: Then apply a very thin layer of the selected colour to the nail, decorate the colour gradient as desired with a rosewood stick and cure under the LED lamp according to the table. This process can be repeated once to intensify the colour.
Step 5: Finally, apply a layer of Hard Top and cure under the LED lamp according to the table to smooth and seal the nail.
Step 6: Cure under the LED lamp according to the table and wipe off with a cellular tissue soaked in cleaner.
Application for a metallic effect:
Step 1: Gently matt the nails with a buffer, remove dust and wipe off with a cellular tissue soaked in cleaner.
Step 2: Apply a thin layer of Hard Base and cure under the LED lamp according to the table.
Step 3: Turn the UV nail polish bottle in your hands before use (do not shake!) so that the small metal particles are evenly distributed.
Step 4: Then apply a very thin layer of the selected colour to the nail and cure under the LED lamp according to the table. This process can be repeated once to intensify the colour.
Step 5: Finally, apply a layer of Hard Top and cure under the LED lamp according to the table to smooth and seal the nail.
Step 6: Cure under the LED lamp according to the table and wipe off with a cellular tissue soaked in cleaner.
Application for a cat-eye satin effect:
Step 1: Gently matt the nails with a buffer, remove dust and wipe off with a cell tissue soaked in Cleaner.
Step 2: Apply a thin layer of Hard Base and cure under the LED lamp according to the table.
Step 3: Turn the UV nail polish bottle in your hands before use (do not shake!) so that the small metal particles are evenly distributed.
Step 4: Then apply a very thin layer of the selected colour to the nail, run a magnet vertically along the free edge of the nail at a distance of 5 mm and then cure under the LED lamp according to the table. This process can be repeated once to intensify the colour.
Step 5: Finally, apply a coat of Hard Top and cure under the LED lamp according to the table to smooth and seal the nail.
Step 6: Cure under the LED lamp according to the table and wipe off with a cellular tissue soaked in cleaner.
Application for a pearlescent effect:
Step 1: Gently matt the nails with a buffer, remove dust and wipe off with a cell tissue soaked in Cleaner.
Step 2: Apply a thin layer of Hard Base and cure under the LED lamp according to the table.
Step 3: Turn the UV nail polish bottle in your hands before use (do not shake!) so that the small metal particles are evenly distributed.
Step 4: Then apply a very thin layer of the selected colour to the nail, decorate the colour gradient as desired with a rosewood stick and cure under the LED lamp according to the table. This process can be repeated once to intensify the colour.
Step 5: Finally, apply a layer of Hard Top and cure under the LED lamp according to the table to smooth and seal the nail.
Step 6: Cure under the LED lamp according to the table and wipe off with a cellular tissue soaked in cleaner.
Contents
Bis-HPMA Poly(1,4-Butanediol)-14/IPDI Copolymer, Hydroxypropyl Methacrylate, Bis-Trimethylbenzoyl Phenylphosphine Oxide, Cellulose Acetate Butyrate, Ethyl Trimethylbenzoyl Phenylphosphinate, Polyethylene Terephthalate, Mica, Silica, Acrylates Copolymer, Tin Oxide, BHT, p-Hydroxyanisole, +/- CI 77891, CI 77499, CI 15850, CI 77000, CI 74260, CI 74160, CI 15880, CI 15985, CI 19143.
Warnings
For professional use only. Read instructions for use carefully. Avoid skin contact. Avoid contact with eyes. May cause allergic reactions. Discontinue use if irritation occurs. Keep out of the reach of children.
Protect from sunlight.
Manufacturer
You might also be interested in


 Certified security