
NEONAIL Starter sets 21 Day Perfect Nails

Our recommendations for you
Filter
*contains reviews from the international parfumdreams shops. Reviews are not checked for authenticity
Product information
Description
21 Day Perfect Nails,
Range
Starter sets
Product sub-line
Gift sets
Skin
all skin types
Characteristics
glossy, long-lasting
Product type
bottle, box
Area of application
nails
Finish
covering
For professional use only. Avoid skin contact. Please read the instructions for use carefully.
- contains everything you need for a unique UV manicure
- makes multi-colour looks or unusual nail designs child's play
- for a scratch-resistant manicure that lasts up to three weeks
- fantastic colour intensity thanks to high-quality pigments
For professional use only. Avoid skin contact. Please read the application instructions carefully
NEONAIL 21 Days Starter Set: getting started with UV manicures
The 21 Days Starter Set from NEONAIL contains everything you need for unique manicure styles - the three radiant colours of the UV nail polish give you the opportunity to let your creativity run wild. The colour polish provides full coverage with just one coat, hardens under the LED lamp within a few seconds and impresses with a high-gloss finish, while stabilising the natural nail completely unnoticed. The base and top are indispensable for manicures with UV nail polish: together they ensure a fabulous hold of up to three weeks, including a scratch-resistant and chip-resistant high-gloss finish. The specially developed brush enables precise, super-even application of the UV nail polish, which promises fantastic colour intensity thanks to high-quality pigments. For a new look on your nails, simply reach for the UV nail polish remover - it makes it easy to remove the coloured polish from the nail. For professional use only.
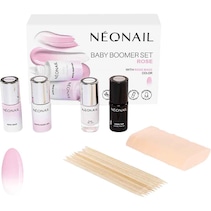
The set contains
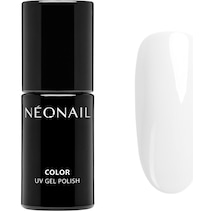
- one UV nail polish in French Pink Medium (3 ml)
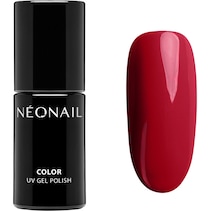
- one UV nail polish in Raspberry Red (3 ml)
- one UV nail polish in Madame de Mode (3 ml)
- one Hard Base (3 ml)
- one Hard Top (3 ml)
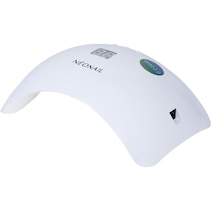
- one LED lamp 10W/36 with display
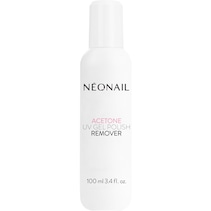
- one Acetone UV Gel Polish Remover (50 ml)
- one Nail Cleaner 50 ml
- Foil Nail Wrap (50 pieces)
- Cells 12-ply (250 pieces)
- 1 polishing file 100/180.
Use
Application:
1. the natural nail is prepared by gently pushing back the cuticle with a rosewood stick. The natural nail is then gently matted with the polishing file. Any nail dust is removed with a cellular tissue soaked in cleaner.
2. a thin layer of primer is then applied
3. the base coat is applied to the nail in a thin layer and cured using the LED lamp
4. a thin layer of the desired colour is then applied and cured under the LED lamp. A second thin layer of colour is then applied, which must also be cured. Darker colours may require a longer curing time.
5 The top coat is now applied to seal the coloured lacquer. After curing under the LED lamp, remove the colour coat with the Cleaner.
6 Finally, a nail oil can be applied for additional care.
Please note: Before use, it is advisable to roll the UV nail polish back and forth between your hands. Care should be taken with each coat to ensure that the tip of the nail is sufficiently coated.
Removal:
1. gently roughen the sealing layer with a nail file.
2. the nail foil wraps are soaked in acetone and wrapped tightly around the fingernail. This should be left on for 10 minutes.
3. the UV nail polish is removed gently and without excessive pressure using a rosewood stick. If the polish is not yet completely removed from the fingernail, steps 2 & 3 can be repeated.
Contents
DI-HEMA TRIMETHYLHEXYL DICARBAMATE, HEMA, HYDROXYCYCLOHEXYL PHENYL KETONE, BIS-TRIMETHYLBENZOYL PHENYLPHOSPHINE OXIDE, P-HYDROXYANISOLE, +/- CI 15850, CI 77499, CI 77492, CI 77510, CI 77742, CI 77891, CI 77289, CI 17200, CI 77007, CI 15985, CI 77491DI-HEMA TRIMETHYLHEXYL DICARBAMATE, HEMA, HYDROXYCYCLOHEXYL PHENYL KETONE, BIS-TRIMETHYLBENZOYL PHENYLPHOSPHINE OXIDE, P-HYDROXYANISOLE, +/- CI 15850, CI 77499, CI 77492, CI 77510, CI 77742, CI 77891, CI 77289, CI 17200, CI 77007, CI 15985, CI 77491DI-HEMA TRIMETHYLHEXYL DICARBAMATE, HEMA, HYDROXYCYCLOHEXYL PHENYL KETONE, BIS-TRIMETHYLBENZOYL PHENYLPHOSPHINE OXIDE, P-HYDROXYANISOLE, +/- CI 15850, CI 77499, CI 77492, CI 77510, CI 77742, CI 77891, CI 77289, CI 17200, CI 77007, CI 15985, CI 77491Polyurethane Acrylate Oligomer, HEMA, Hydroxycyclohexyl Phenyl Ketone, Bis-Trimethylbenzoyl Phenylphosphine OxidePolyurethane Acrylate Oligomer, HEMA, Hydroxycyclohexyl Phenyl Ketone, Bis-Trimethylbenzoyl Phenylphosphine Oxide.
Warnings
For professional use only. Read instructions for use carefully. Avoid skin contact. Avoid contact with eyes. May cause allergic reactions. Discontinue use if irritation occurs. Keep out of the reach of children.
Manufacturer
You might also be interested in










 Certified security


